Introduction:

Image: www.youtube.com
As the winter winds start to whisper and snow gracefully twirls from the sky, it’s time to embrace the magic of the season with a heartwarming craft that brings joy to both the maker and the recipient. The humble snowflake, intricately designed by nature, holds a special place in the winter lore, evoking memories of laughter and wonder. Let’s delve into the art of creating your own snowflake masterpiece, a card that carries a piece of winter’s enchantment.
A Canvas of White: The Art of Snowflake Creation
Snowflakes, delicate crystals of ice, are formed in the frosty embrace of the clouds. As water molecules join hands, they form the intricate six-fold structures that captivate our imagination. To mimic this natural artistry, we turn to paper, our blank canvas, where we can design our own snowflake creations.
Materials:
Gather the tools for your winter wonderland:
- White cardstock or thick paper
- Scissors
- Ruler and pencil
- Glue
- Optional: glitter, sequins, or other embellishments
Step 1: Crafting Your Snowflake Canvas
Begin with a sheet of white cardstock. Measure and fold it in half, creating a card base. Use scissors to carefully cut a square from the center of the folded card, measuring approximately 6 inches by 6 inches. This will be the window that frames your sparkling snowflake.
Step 2: The Perfect Snowflake: Six-Fold Symmetry
On a separate sheet of paper, create a symmetrical snowflake template. Draw a vertical line and a horizontal line intersecting at the center. Now, draw six lines from the center point to the edges of the paper, creating a hexagonal shape.
Step 3: Shaping Your Snowflake: The Art of Cutting
Place your snowflake template over the cut-out square on your card base. Use sharp scissors to carefully cut along the lines, following the intricate six-fold symmetry. Be gentle, as the intricate cuts will define the beauty of your snowflake.
Step 4: The Joy of Unfolding: Revealing Your Creation
Once all the cutting is done, slowly unfold your card. The snowflake, with its delicate arms and lacy patterns, will magically emerge before your eyes. The simple cuts you made have transformed into a winter masterpiece.
Step 5: Embrace Embellishments: Sparkle and Shimmer
If you wish, add a touch of winter sparkle to your snowflake. Apply glue to small areas of the snowflake and sprinkle glitter or sequins over it. Let the glue dry, and shake off any excess embellishments. Your snowflake will now shimmer and catch the light, adding an extra touch of festive charm.
Step 6: A Personalized Touch: A Written Message
Inside your snowflake card, write a heartwarming message to convey your winter wishes. Share a message of love, friendship, or simply a touch of seasonal cheer. Let your words warm the heart of the recipient as they admire your creation.
Conclusion:
Creating a snowflake card is not just a craft; it’s a way to spread winter magic and share a piece of your heart with loved ones. The intricate cuts, the sparkling embellishments, and the heartfelt words all come together to create a unique and unforgettable gift that will bring joy throughout the winter season. As you delve into the art of snowflake card making, may your creations weave a web of winter cheer and bring a smile to every face they touch.
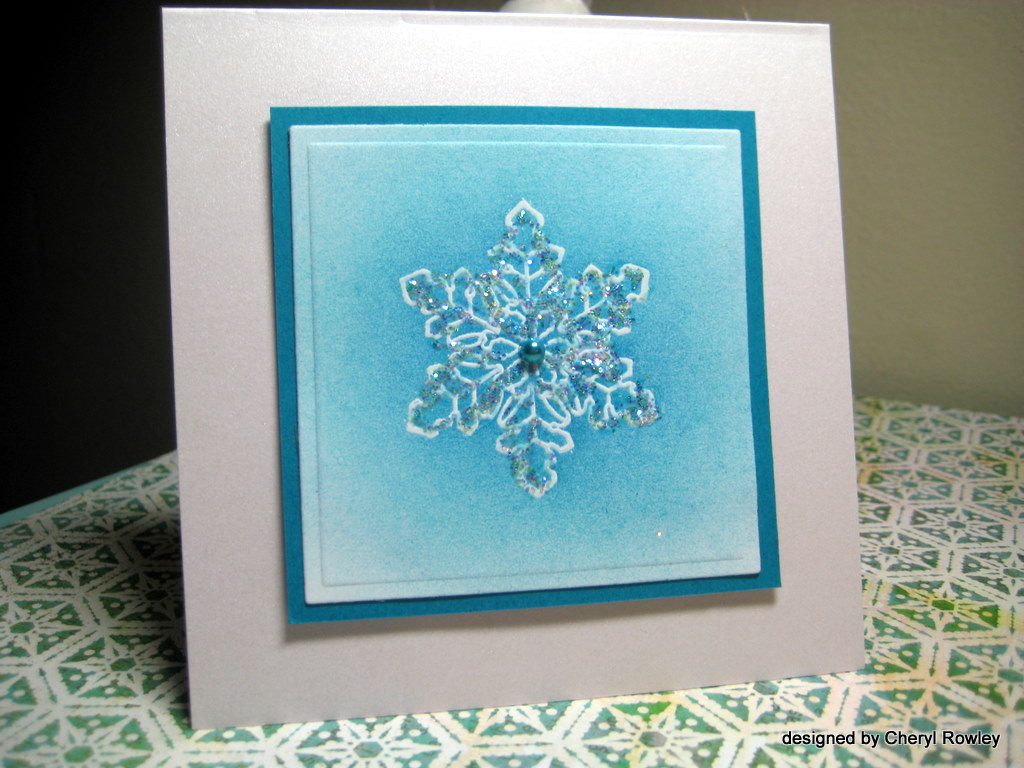
Image: cheryllrowley.blogspot.com
How To Make A Snowflake Card


