In the tapestry of human history, flags have played an enduring role as evocative symbols of nations, cultures, and aspirations. From the iconic Stars and Stripes to the vibrant green, white, and orange of the Irish tricolor, these vibrant pieces of fabric evoke a profound sense of identity, pride, and belonging. If you’ve ever admired the artistry and symbolism of flags, you may have wondered how to embark on the rewarding journey of creating your own. In this comprehensive guide, we will take you through the fascinating process of making a flag with fabric, empowering you to capture the essence of your creativity and patriotism.
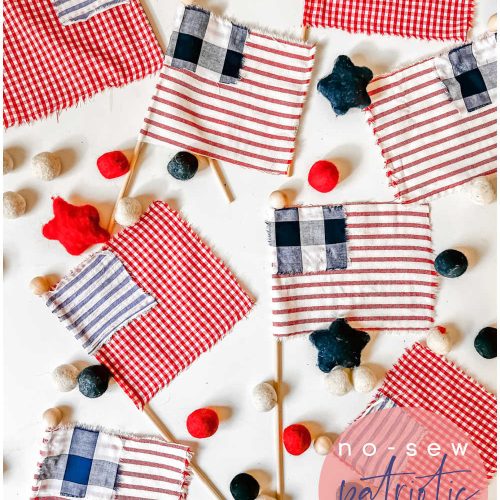
Image: tatertotsandjello.com
Unveiling the History and Significance of Flags
Throughout history, flags have evolved from simple banners used for military identification to elaborate works of art that represent nations and ideologies. The earliest known flags date back to ancient Egypt, where pharaohs carried standards adorned with hieroglyphics. In medieval Europe, knights used colorful pennants to distinguish themselves on the battlefield, while merchant guilds and religious orders adopted unique flags to promote their trade and信仰. Today, flags continue to be revered as symbols of national unity, cultural heritage, and global cooperation.
Embarking on the Journey: The Materials You’ll Need
Before embarking on your flag-making adventure, it’s essential to gather the necessary materials. Here’s a comprehensive list to ensure you have everything you need:
-
Fabric: Choose durable, high-quality fabric in the desired colors for your flag. Common options include cotton, linen, or synthetic blends.
-
Sewing machine: A sewing machine is essential for stitching the fabric pieces together. If you don’t have one, consider borrowing from a friend or using a sewing studio.
-
Thread: Select thread that matches the color of the fabric for a seamless finish.
-
Scissors: Sharp scissors are essential for cutting the fabric and trimming seams.
-
Ruler or measuring tape: These tools will help you ensure precision when cutting and sewing.
-
Iron and ironing board: Ironing the fabric before cutting and sewing will help it lay flat and make the process easier.
-
Optional: Stitch ripper, thimble, and fabric glue for added convenience.
Step-by-Step Instructions: Unlocking the Art of Flag Making
With your materials ready, let’s dive into the detailed instructions for creating your very own flag:
1. Design Your Flag: Begin by designing your flag’s dimensions and layout. Sketch your vision on paper, using a ruler or measuring tape for accuracy. Consider the aspect ratio (length to width) and the placement of any symbols or designs.
2. Cut the Fabric: Once your design is finalized, it’s time to cut the fabric. Measure and cut the fabric pieces according to your plan. Iron the fabric before cutting to ensure straight cuts and prevent fraying.
3. Sew the Union and Appliqué: If your flag features a union (a distinctive shape or symbol in the corner), attach it to the main fabric piece by sewing around the edges. For appliqué designs, cut the shapes from a contrasting fabric and attach them to the main fabric using stitches or fabric glue.
4. Join the Fabric Pieces: Line up the fabric pieces and pin them together along the edges. Sew around the perimeter, leaving a small opening for turning. Trim the excess fabric and turn the flag right side out.
5. Finish the Edges: Fold the raw edges of the opening inward and stitch them down to create a clean finish. You can also add a border or heading to the flag for added durability and style.
6. Hoist Your Creation: Display your completed flag with pride! Attach it to a flagpole, hang it on a wall, or use it as a centerpiece for a special occasion.

Image: www.wikihow.com
Expert Insights: Enhancing Your Flag-Making Skills
To further elevate your flag-making skills, consider these valuable insights from seasoned crafters:
-
Use a variety of stitches to create different effects. For example, a simple stitch can secure the fabric pieces, while a decorative stitch can add visual interest.
-
Experiment with different fabrics and textures. Velvet, silk, and metallic fabrics can add a touch of luxury and sophistication to your flag.
-
Be precise with your measurements and cuts. Accurate cutting ensures a clean and professional-looking finish.
-
Don’t be afraid to make mistakes. Flag making is a learning process, and mistakes are an opportunity to refine your skills.
How To Make A Flag With Fabric
https://youtube.com/watch?v=6PjrrP4uUt0
Conclusion: A Symbol of Pride and Creativity
Congratulations on completing your handmade flag! You have not only created a unique piece of art but also an expression of your patriotism, creativity, and individuality. Whether you display your flag as a cherished heirloom or share it with the world, it will serve as a testament to your passion and skill.
As you admire your completed flag, take a moment to reflect on the journey you have undertaken. From gathering the materials to sewing the final stitch, you have demonstrated patience, perseverance, and an unyielding spirit. Embrace the pride and accomplishment that comes with creating something meaningful with your own hands.
Should you wish to explore further, consider joining a local flag-making group or volunteering to teach flag-making skills to others. The world of flag making is vast and rewarding, offering countless opportunities to express yourself and connect with fellow enthusiasts.


:max_bytes(150000):strip_icc()/ideas-for-removing-odors-from-wood-3536463-FINAL-54b76a445dfb41acb4ba0c413bd80e80.png?w=740&resize=740,414&ssl=1)


