In a world where convenience often reigns supreme, there’s something deeply satisfying about venturing into the realm of homemade culinary creations. From artisanal sourdough loaves to tantalizing pastries, mastering the art of creating food from scratch offers immense rewards. Embarking on the journey of homemade butter is one such endeavor that promises delightful results with minimal effort.
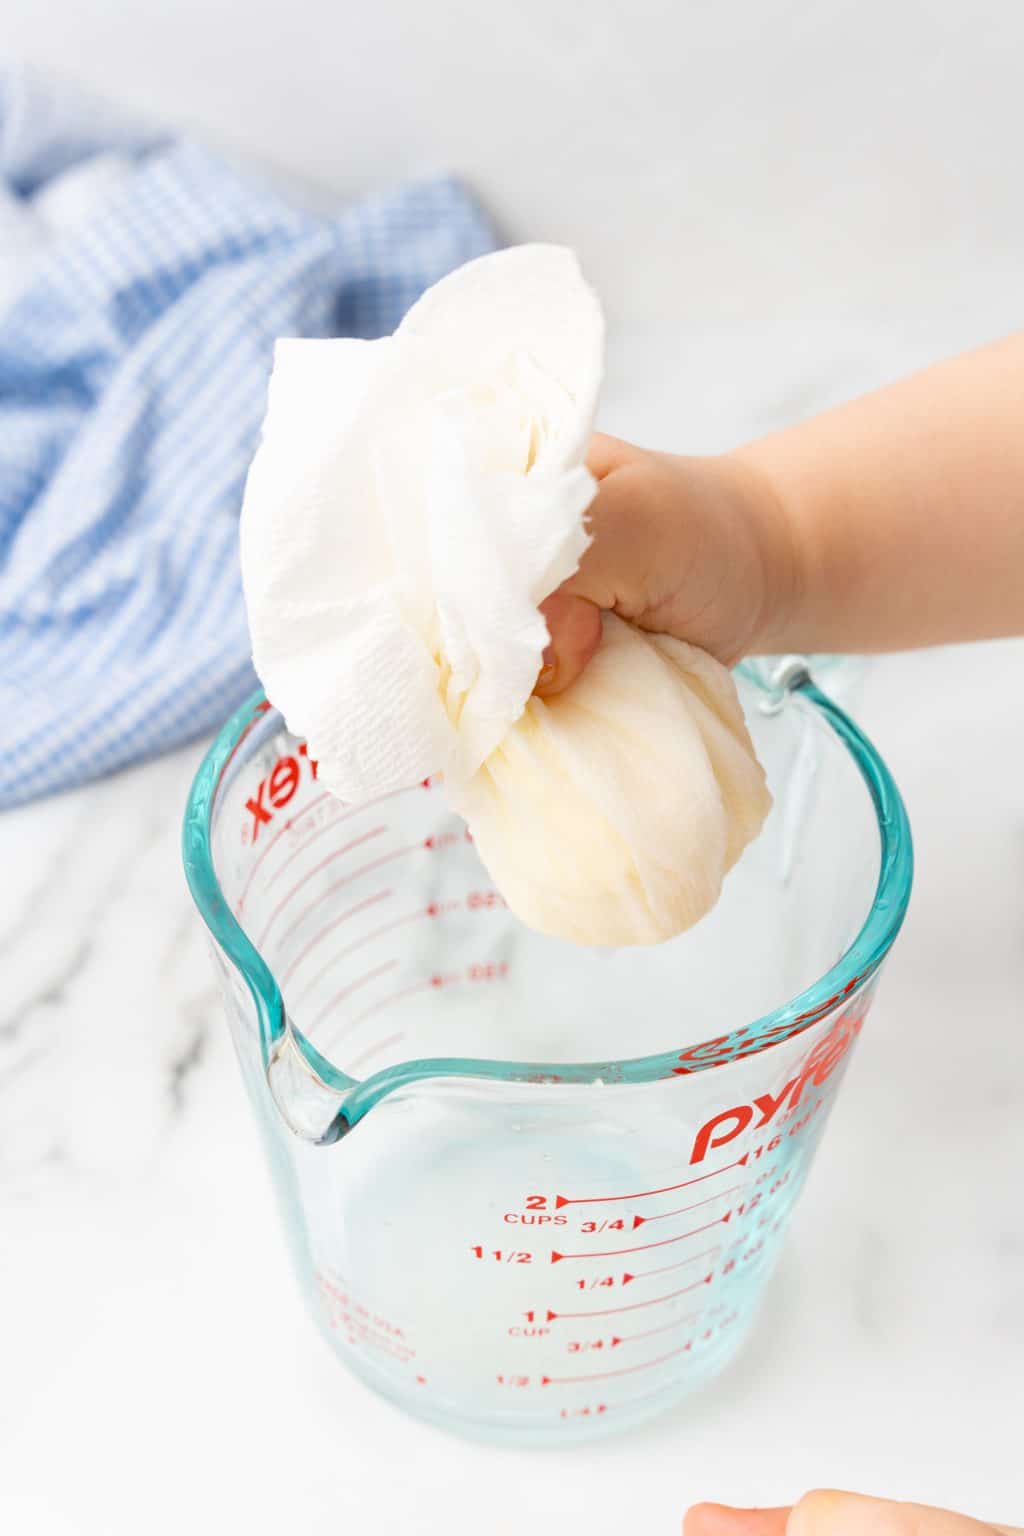
Image: 4sonrus.com
Making butter in a mason jar is an incredibly simple yet rewarding process that transports you back to a simpler time. With just a few basic ingredients and a mason jar, you can create fresh, velvety butter that will elevate your culinary adventures, whether it’s slathering it on warm toast, enriching sauces, or crafting luscious baked goods.
Gathering the Butter-Making Essentials
Before diving into the world of butter-making, you’ll need to gather a few essential ingredients and materials:
-
Heavy cream (or whipping cream): This is the foundation of your homemade butter.
-
Mason jar: A wide-mouth mason jar is your butter-making vessel. Its transparency allows you to observe the transformation taking place within. A 16-ounce jar is an ideal size for a small batch of butter.
-
Cheesecloth or a fine-mesh sieve: This will aid in separating the buttermilk from the butter solids.
-
Salt (optional): If desired, you can add a pinch of salt to taste at the end of the process.
The Transformation into Butter Magic
With your ingredients and tools at hand, it’s time to witness the magical transformation of cream into butter:
-
Fill the Jar: Generously fill your mason jar with heavy cream, leaving about an inch of space at the top.
-
Seal and Shake: Screw on the lid tightly and shake vigorously for 5-10 minutes, or until the cream starts to thicken and separate. Initially, you’ll observe whipped cream forming, but with persistent shaking, it will gradually transform into butter solids suspended in buttermilk.
-
Strain the Butter: Line a fine-mesh sieve or cheesecloth over a bowl and pour the contents of the jar into it. The buttermilk will drain through, leaving you with a mass of butter solids.
-
Rinse and Knead: Rinse the butter solids under cold water to remove any remaining buttermilk. Gently knead the butter in your hands for a few minutes to help expel excess moisture.
-
Season to Taste: If desired, add a pinch of salt to taste and knead it into the butter.
-
Shape and Store: Shape the butter into a block, wrap it in parchment paper or plastic wrap, and store it in the refrigerator for up to 2 weeks.
Homemade Butter: A Culinary Symphony
The beauty of homemade butter lies in its versatility. Spread it over your morning toast, melting into a golden pool of flavor. Use it as a sauce base, enriching pasta dishes or vegetables. Bake with it, adding a luscious richness to cookies, cakes, and pastries. Each culinary creation is transformed into a testament to your hands-on skills and the delight of savoring the fruits of your labor.

Image: www.youtube.com
How To Make Butter In Mason Jar
Embrace the Artisan Spirit
In a world of mass-produced food products, reclaiming the art of homemade staples empowers you to savor the true essence of your culinary creations. By crafting butter in a mason jar, you embark on a journey of self-sufficiency, nourishing your body and spirit with the satisfaction of creating something truly special.


